N8N: RabbitMQ + HTTP + Slack - part 3
In this blog post we will create a slack app and setup a slack node.


This post follows the part 2 of this mini serie about n8n. In the first part we setup Rabbit MQ and created a simple trigger. In the second part, we added a conditional node and an HTTP node. In this post we are going to finish our workflow by adding a slack node.
Now that we get our fact parsed from the step 6, we will extract it from the object returned by the function and send it to a channel as a text message.
Step 7: Configure Slack
In order to send messages, we need to create a Slack App (you will need obviously to have a workspace with some admin rights). To do, let's visit: https://api.slack.com/apps/ and then click on "Create New App" on the top right.
You should see this modal:
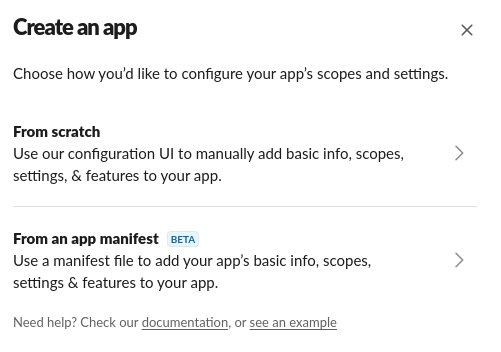
Let's click on "From scratch", then let's give it a name and assign it a workspace:
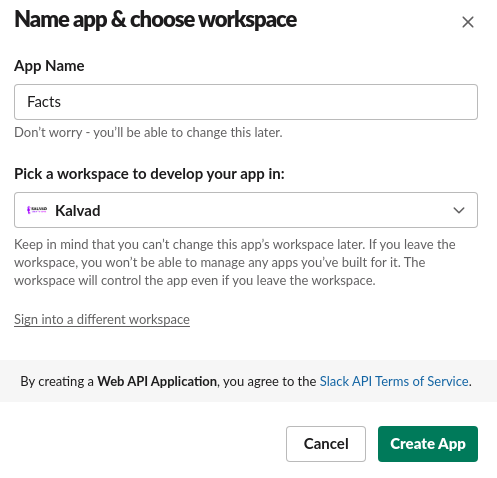
We can now click on "Create App". We are going to be redirected on a page dedicated to the configuration of our new app we called "Facts".
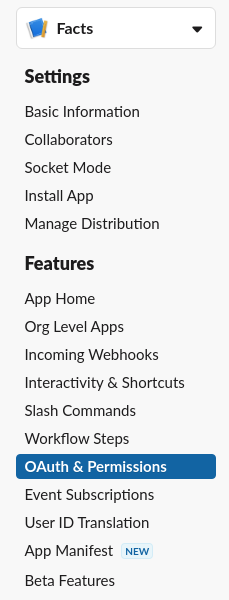
Next we need to configure some permissions and create an access token, to do so let's click on "OAuth & Permissions" on the left menu:
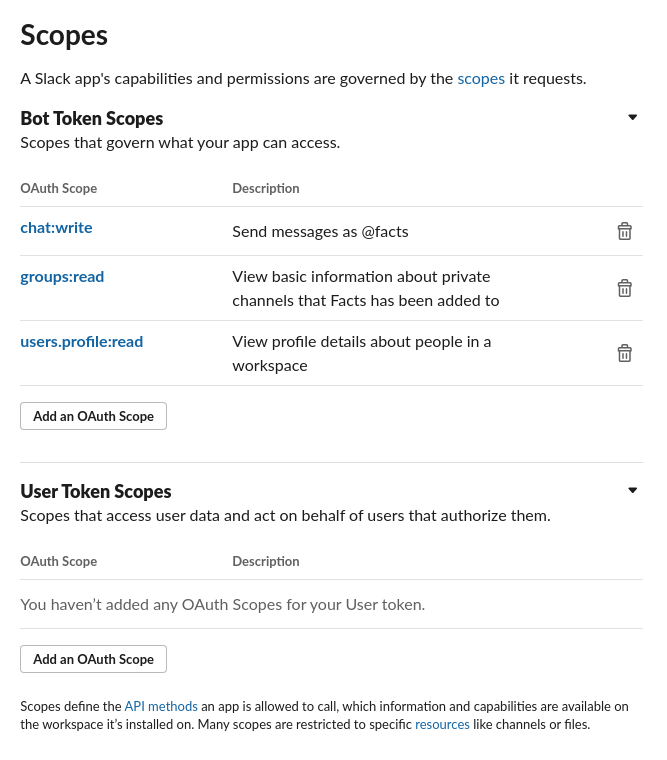
If you scroll down the page you will see a section called "Scopes":
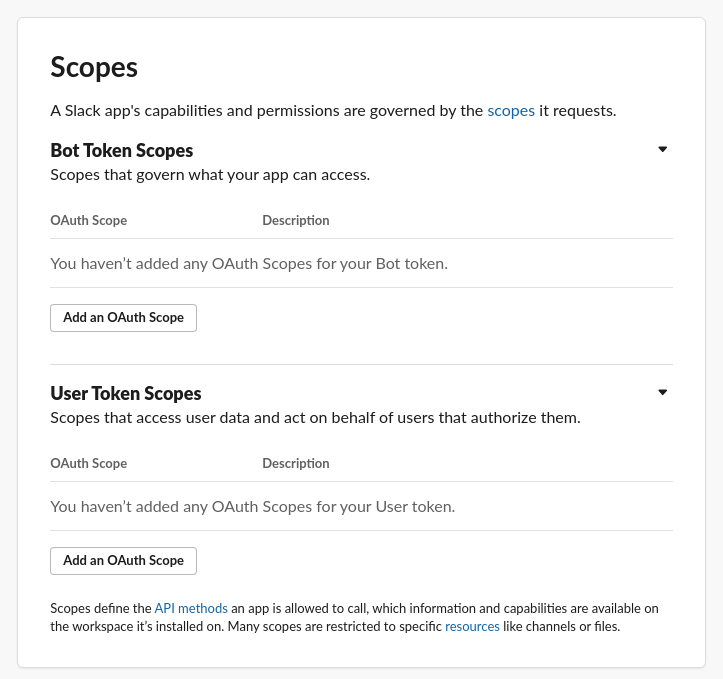
We are going to define our scopes for Bots Token Scopes and then generate our access token:
users.profile.read: See source code of n8n for SlackApi.credentials.ts it actually calls the endpoint '/api/users.profile.get' to test that the token is working.groups.read: So that we can add our bot to a channel (manually).chat.write: So that we can send text messages automatically from our workflow.
You should have the following:
Next we are going to install the app on our workspace in order to obtain our Bot User OAuth Token. To do so, we need to scroll all the way up in the section "OAuth Tokens for Your Workspace" and click on "Install to workspace".
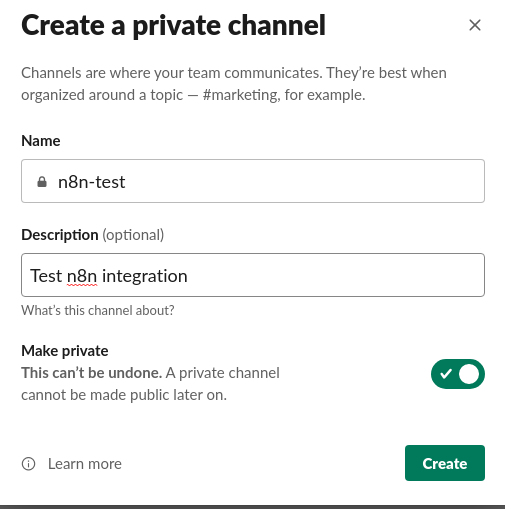
And finally we are going to create a new slack channel called "n8n-test" so we can invite our bot:
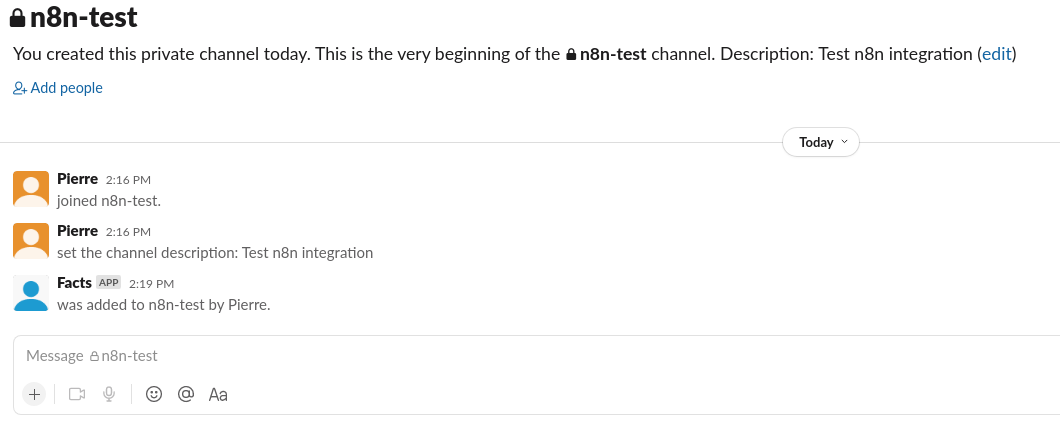
Once created we can type /add and it will open the following modal:

We are going to select "Add apps to this channel", and you should see our slack app in the list :

Please note that if it has a "View" button instead of add it means that you did not add the scope groups.read in the previous step or you did it after installing the app. If that's the case you need to re-install the app in order to get the new scope.
Looks good, now that everything is configured, let's add our node !
Step 8: Slack Node
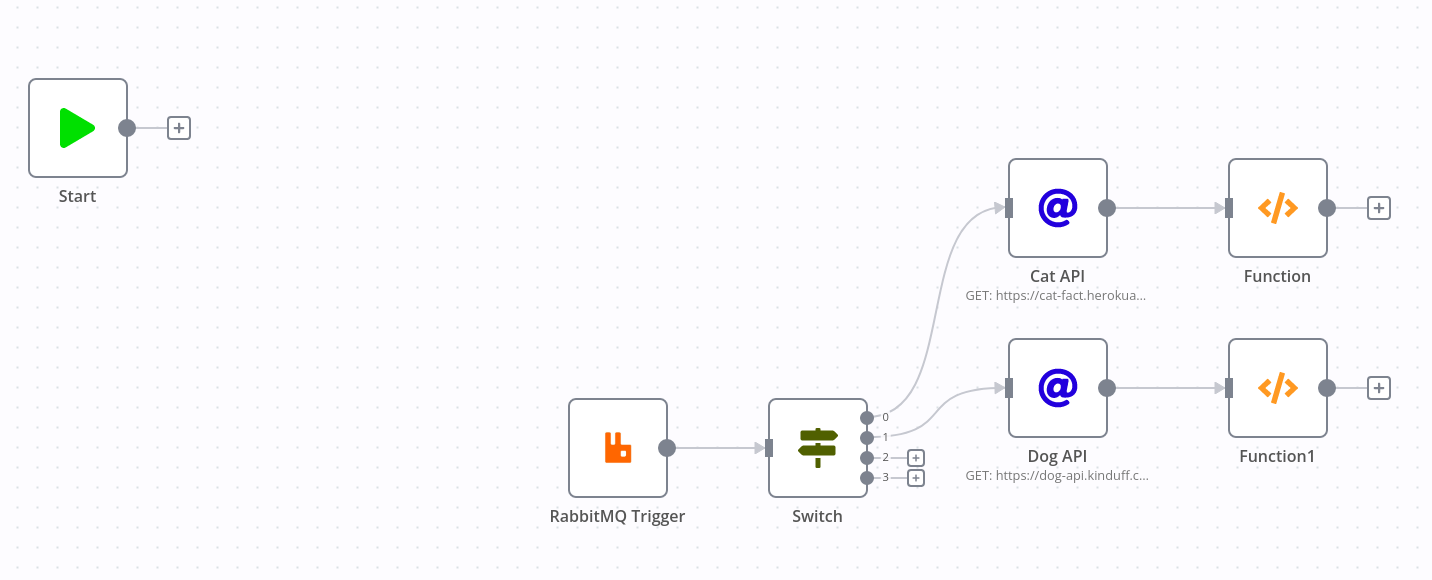
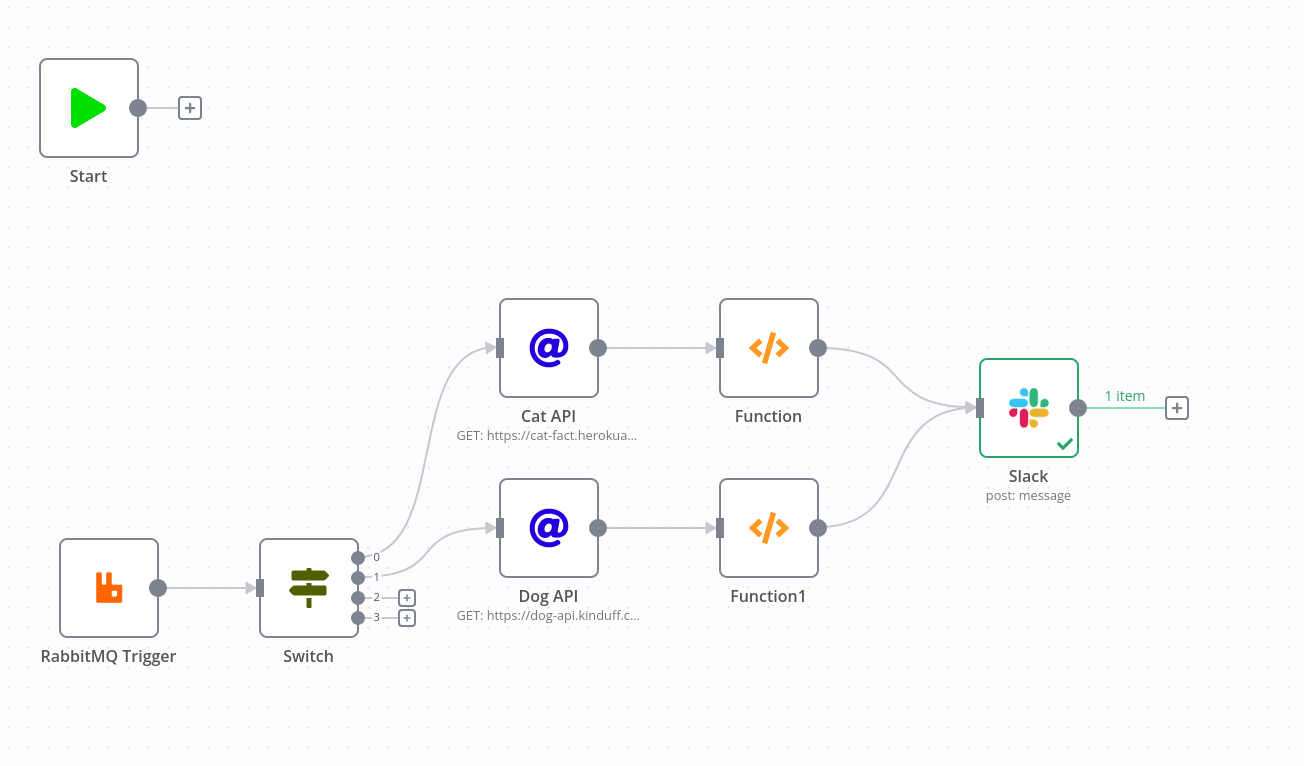
As a reminder this is where we left things in the previous article:
To complete our workflow we are going to connect both our functions to a slack node in order to send our message.
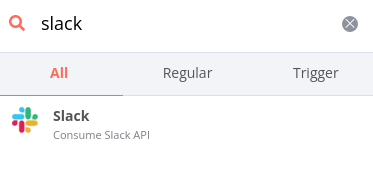
Let's start by adding the slack node by clicking on the orange "+" top right of the n8n canvas and type "slack":
We are going to pick the first (and only) result which will open this modal:
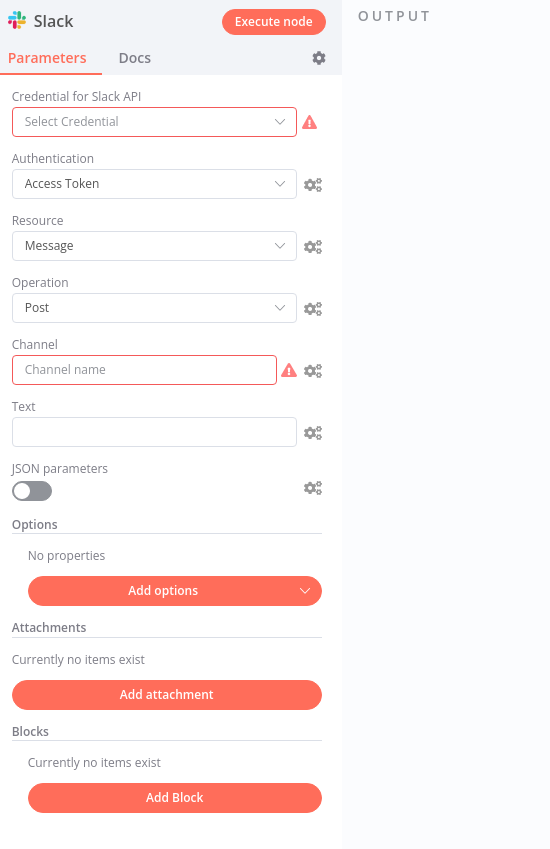
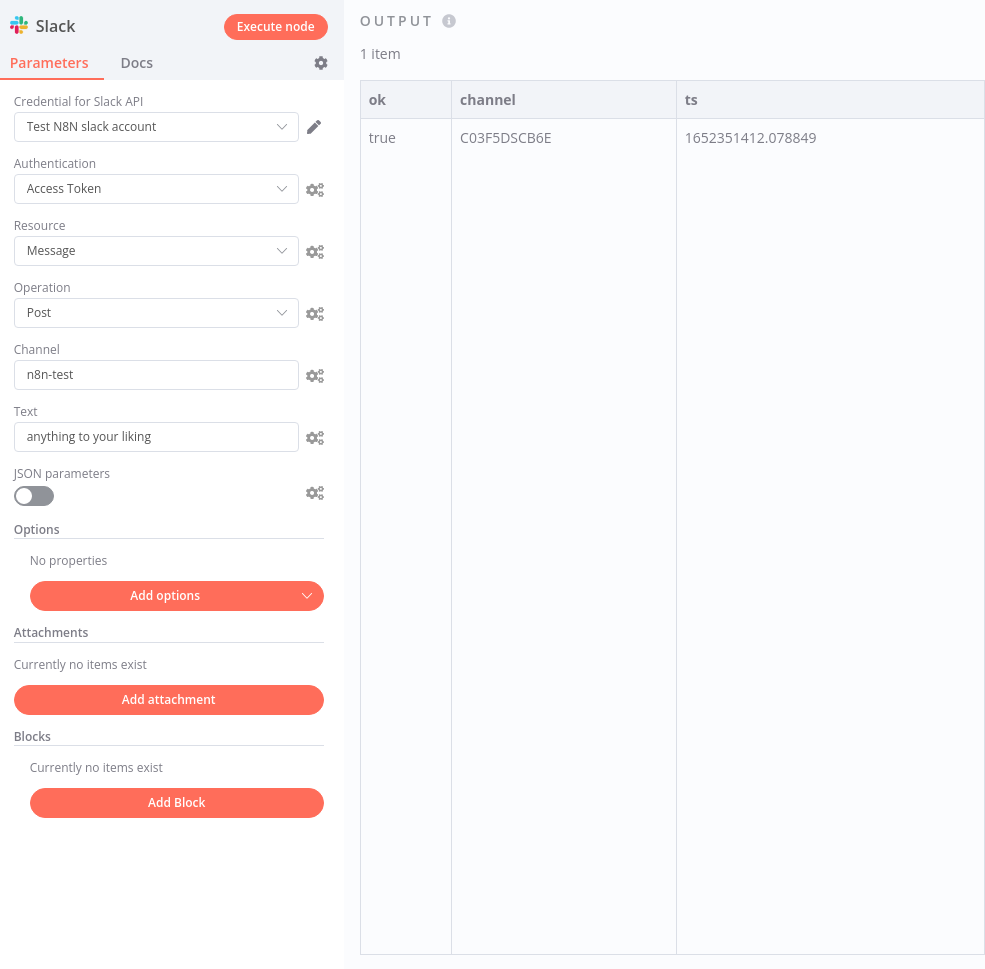
Just like with the RabbitMQ node we need to start by setting up the credentials, which is pretty easy in this case. We need to copy the Bot User OAuth Token from the slack app settings page and paste it in the access token field, if you configured all scopes correctly you should get this:

If it fails it is because you did not add the users.profile.read scope or did not re-install the Slack App after adding it.
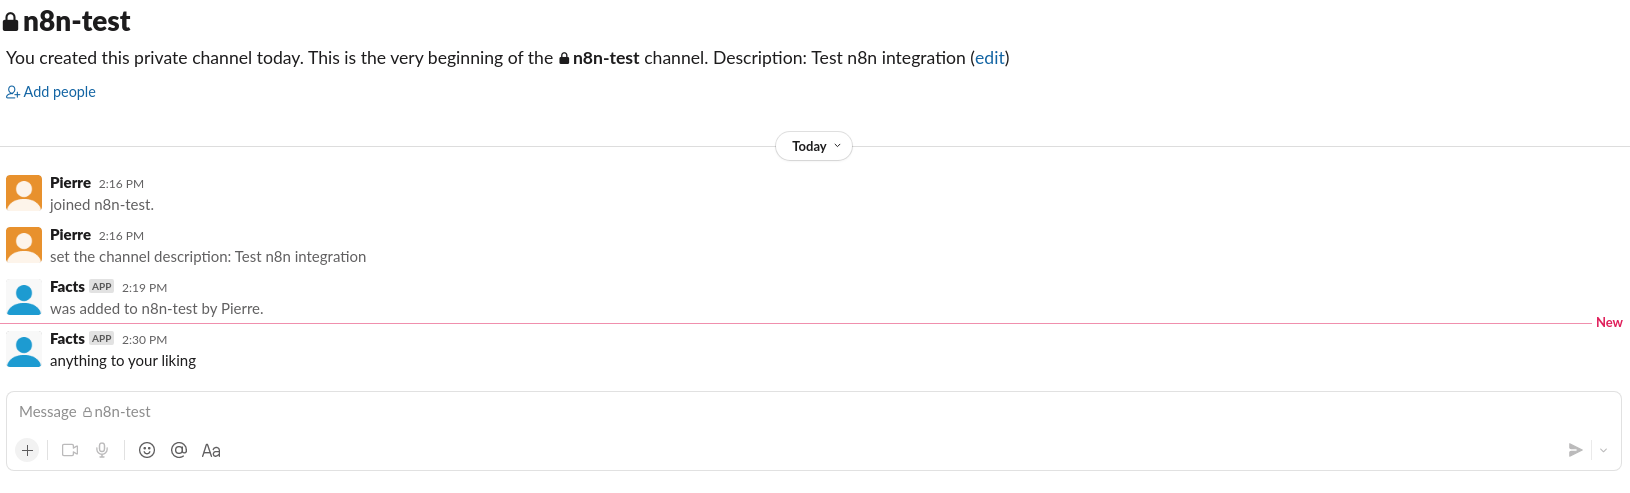
Next we are going to put "n8n-test" in the "Channel" field, and just to make sure it works we are going to send a test message. Click in the "Text" input and enter anything to your liking then execute the node. You should get this:
And in your slack channel:
If it fails, it is because you did not add the chat.write scope or did not re-install the Slack App after adding it.
Now that we are certain our configuration is correct, let's plug it to our functions like so:
Depending on your monitor's size, you should select the whole workflow (click and make a rectangle to select everything, then release, like on Google Draw for example) and move it to the left so you have more space on the right to put your new node and connect it by dragging the "+" at the end of each function to the slack node.
Next we are going to replace our dummy text by an expression by clicking on the little cogwheel and "Add expression" to enter this: {{$json["fact"]}}. This will get the input (always in JSON format) and extract the content of the keyfact. Because both functions respect the same format, we can use this shortcut.
Now let's trigger a "dog" workflow:
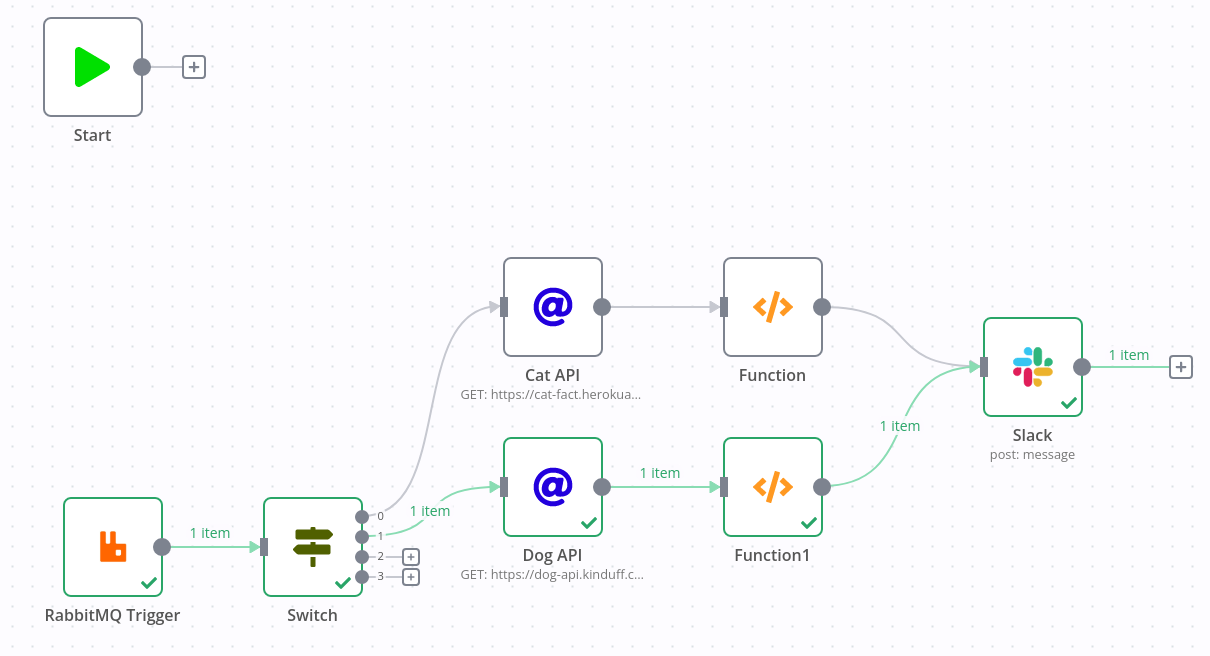

Great, even though I already knew this one. Now let's trigger a "cat" workflow:
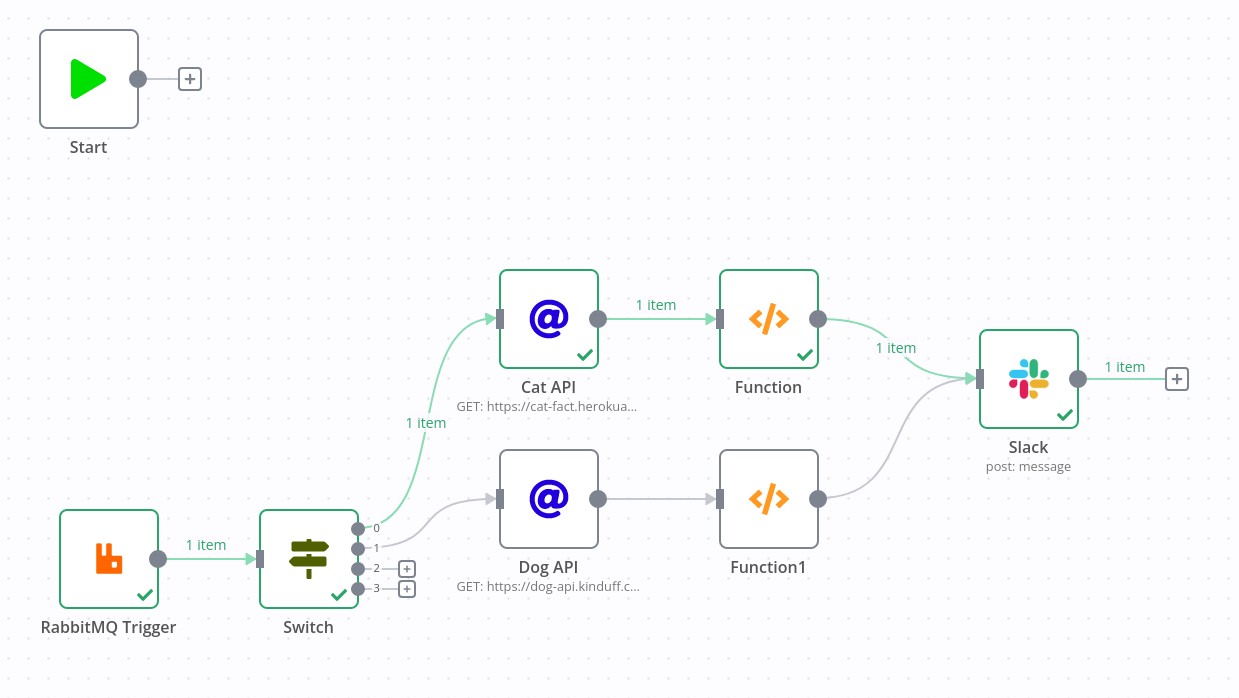

Perfect ! Not only our workflow works flawlessly but we clearly established the dominance of cats over dogs.
Conclusion
This is the end for this mini series, even though the workflow was questionable in terms of usefulness I hope it gave a good overview of the system and maybe even help a few of you stuck on some configuration problems (I had to go through the source code of n8n to understand all the required scopes of slack back then).
We wrote an article about deploying n8n on clever-cloud a while back in case you are curious about hosting it. We will probably continue writing more posts in the future about this great tool as there is much more to discover (we barely scratched the surface about functions for instance) so keep posted !
If you have a problem and no one else can help, maybe you can hire the Kalvad-Team.