N8N: RabbitMQ + HTTP + Slack - part 2
In this blog post we will setup a conditional node and an HTTP node.


This post follows the part 1 of this mini serie about n8n. In the first part we setup Rabbit MQ and created a simple trigger. In this post, we will focus on chaining 2 more nodes on our existing workflow: a conditional node and an HTTP node.
We are going to define a scenario to give some sense to our workflow: whenever we are receiving a message in our queue, we are going to check its type. The type can only be 2 things: cat or dog. If it's cat we will get a fun and instructive fact about cats through https://cat-fact.herokuapp.com/#/. If it's dog we will get a witty and useful fact about dogs through https://kinduff.github.io/dog-api/.
Step 4: Conditional node
First thing first, we need to get this type from the message and define our condition. Let's click on the orange "+" button top right to open the list of available nodes. We are going to search for "cond":
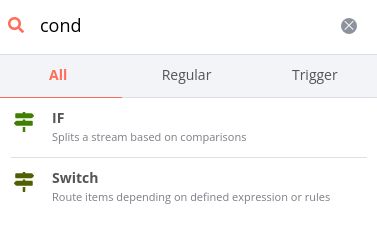
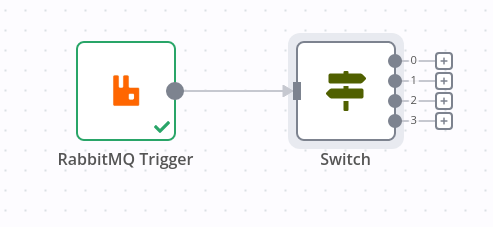
Note that there are 2 possible conditional nodes, IF or Switch; because we are considering adding bird facts in the future, let's add a Switch to anticipate our upcoming requirements.
Once you select the Switch you should see this:
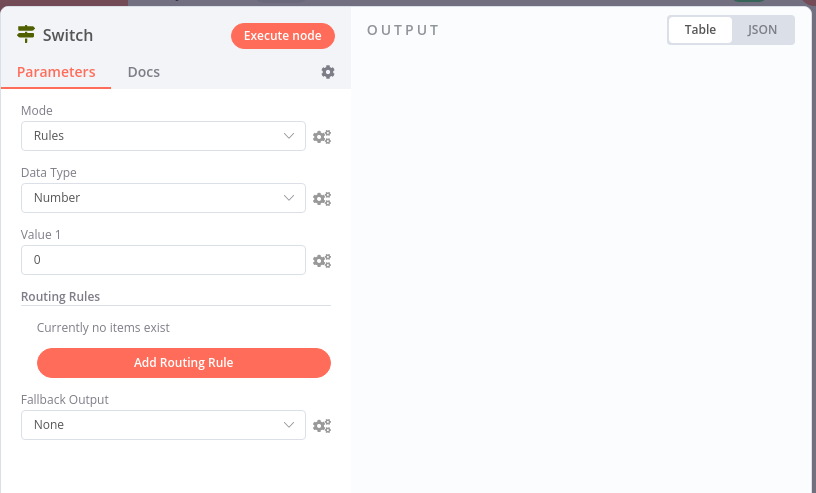
So a lot of things to unpack here:
First of all in n8n a Switch will compare an input value (Value 1, in the screenshot above) to other values which will be defined in a "Routing Rule". Based on the result of the comparison, you will get an output value and then connect another node to this output value. Let's try it out, we will get our type from the Rabbitmq message and then create two routing rules, one for dog and one for cat:
Let's select "String" as a "Data Type" and then let's click on the little cog next on the right of "Value 1", then "Add expression", it will open a new modal to help us select the value that interests us:
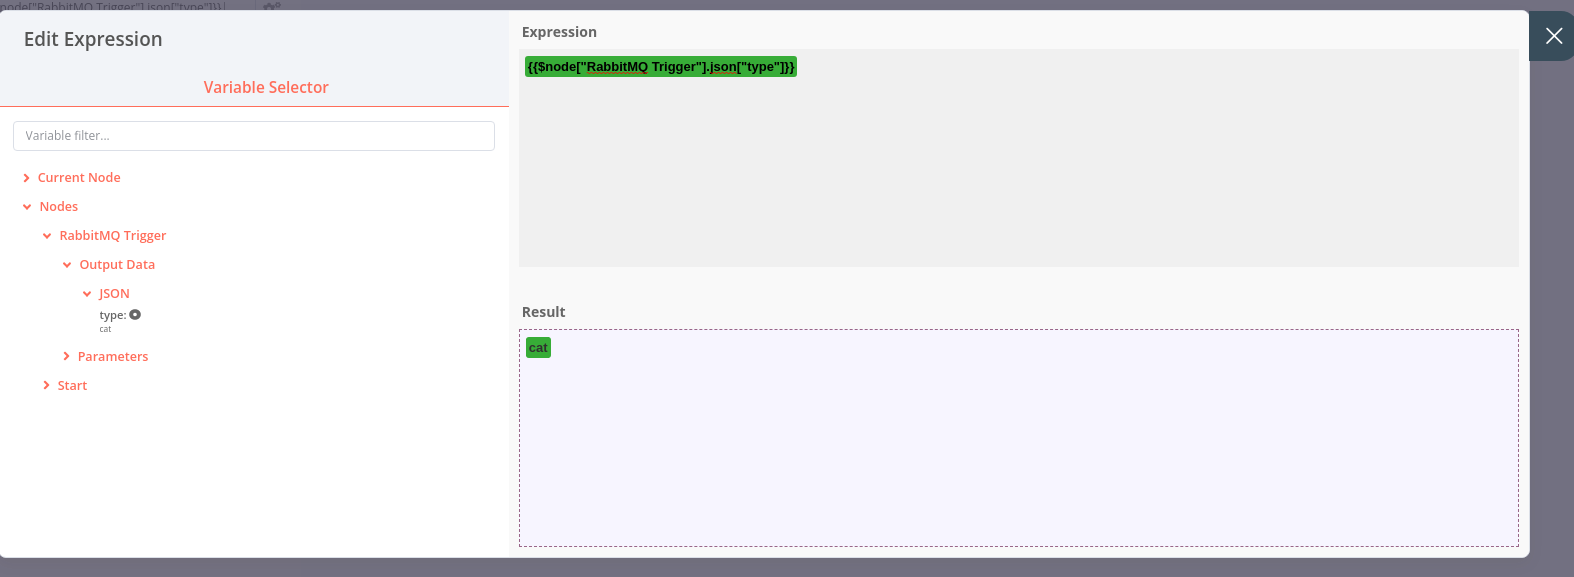
We selected "Nodes" > "RabbitMQ Trigger" > "Output Data" > "JSON" and it automatically filled the textarea with {{$node["RabbitMQ Trigger"].json["type"]}}. Note that on the "Result" area it displays "cat" as I sent a message to my RabbitMQ queue: {"type": "cat"}.
Now, let's close this modal by using the "X" icon top right so we can add our routing rules:
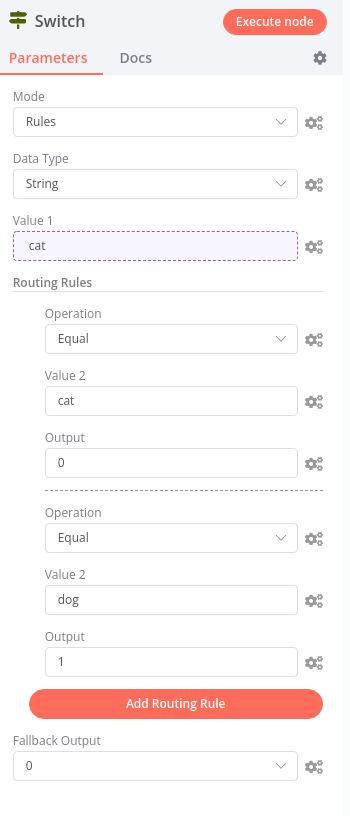
You should have something like this. If we receive cat it goes to 0. If we receive dog it goes to 1. If we receive anything else, the "Fallback Output" sends it to 0. so it will be treated same way as cat.
Now that our Switch config is done, let's close this modal by clicking in the background and connect it to our RabbitMQ Trigger:
Let's click on "Execute Workflow" and try to send another message like so: {"type": "dog"}:
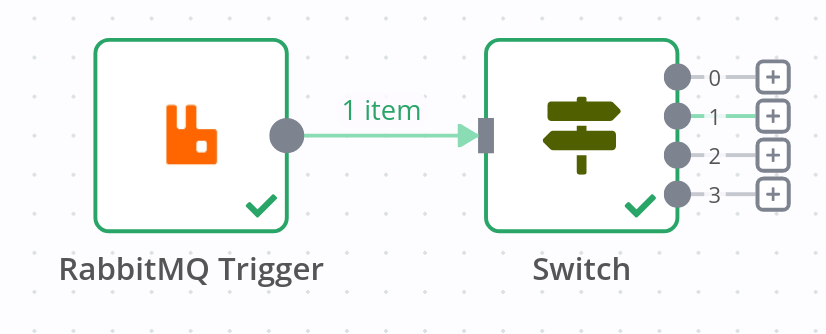
If you zoom into your canvas, you will see that the output 1 is highlighted, must be working !
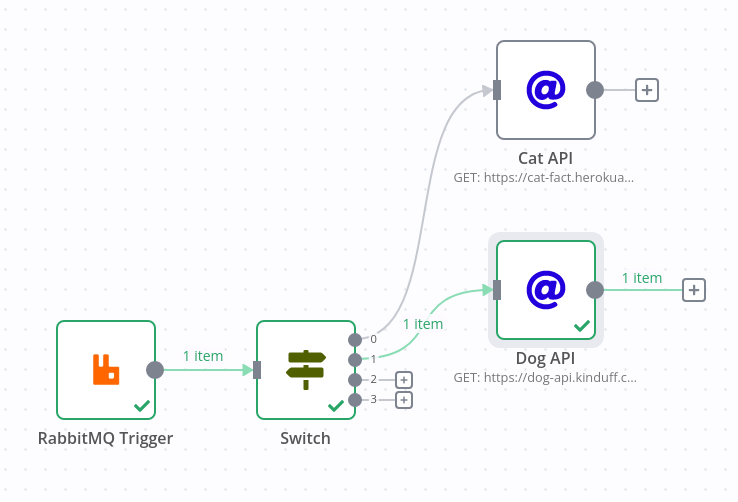
Step 5: HTTP request
Type routing through our Switch is a success, now we need to plug an HTTP request node on output 0 (for cats) and 1 (for dogs). This time instead of using the "+" button top right, let's directly connect our new node to the right output: we are going to click on the "+" icon next to output 0 and search for "http":
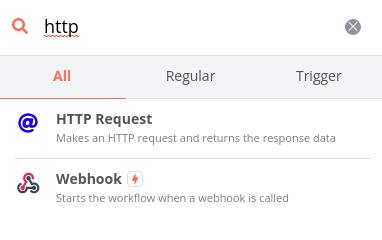
We are going to select the first one "HTTP Request", "Webhook" is another way of handling triggers which will be eventually covered in another article. You should now see a new modal, simply enter the url "https://cat-fact.herokuapp.com/facts" in the "URL" field and click in the grey background to close the modal. Let's do the same for output 1 and we will enter this url: "https://dog-api.kinduff.com/api/facts".
You should have something like that:
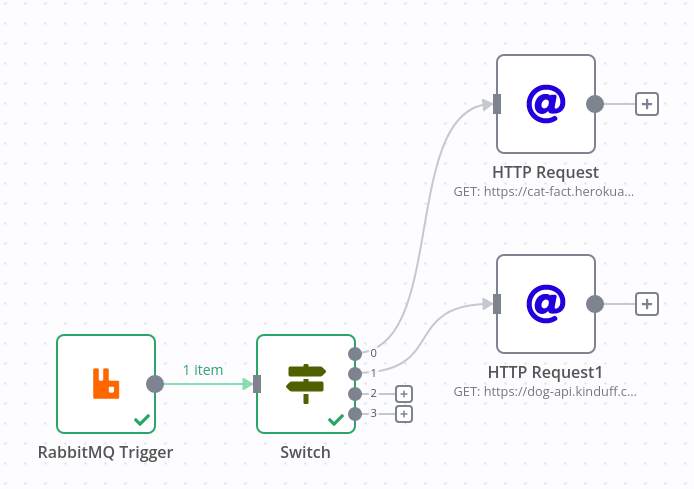
Note that you can rename "HTTP Request" and "HTTP Request1" to something more meaningful, like "Cat API" and "Dog API".
If you run again the whole workflow for {"type": "dog"} you will get this:
And if you click on "Dog API", you will be able to see the API output:
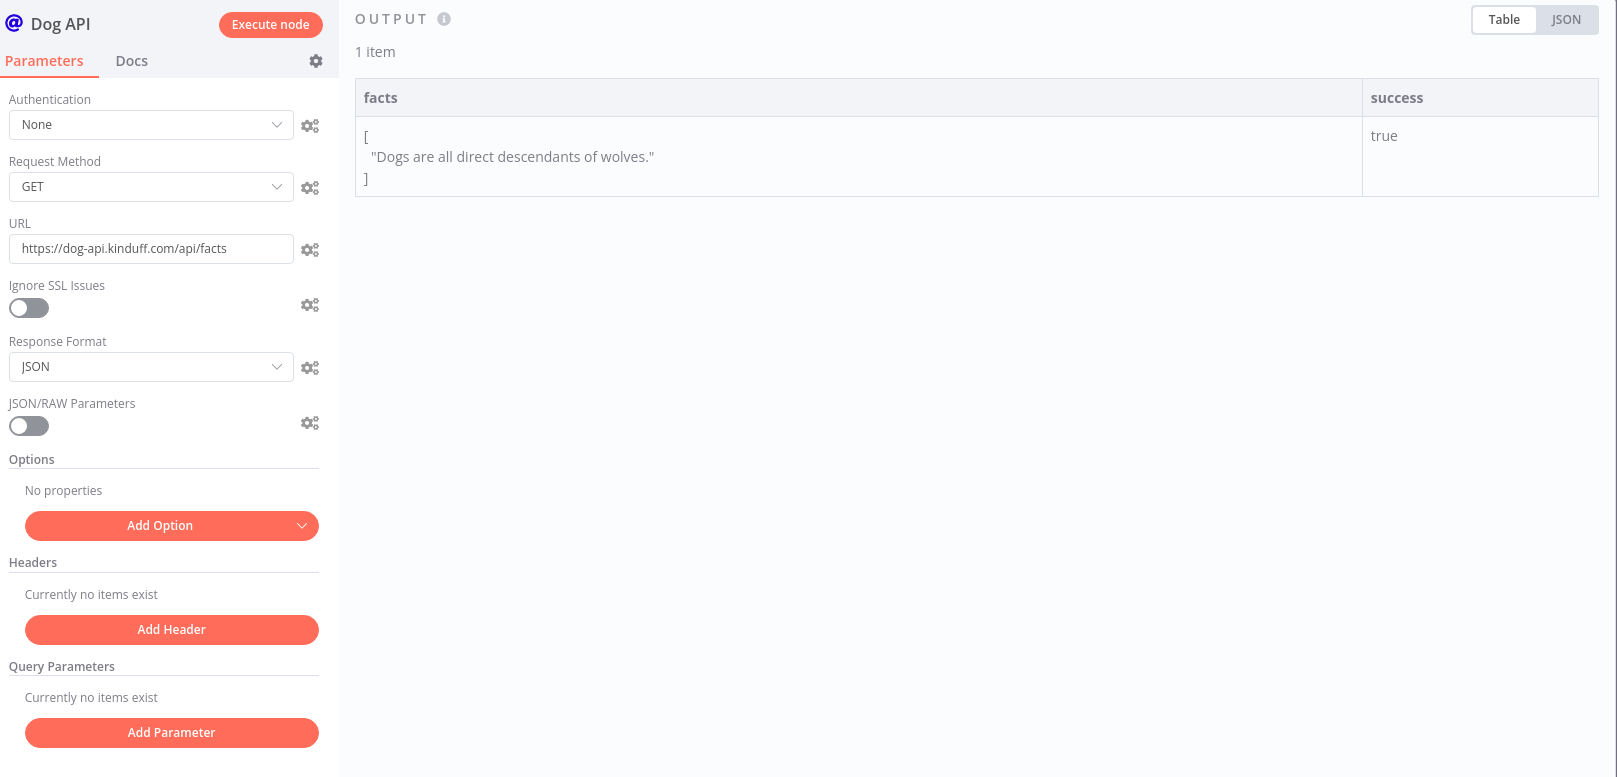
Perfect !
Step 6 : Parse the result
Now we want to get 1 fact out of each API so we can send it to slack (slack will be covered in part 3). To do so, we need to parse each response. Let's start with the Cat API response:
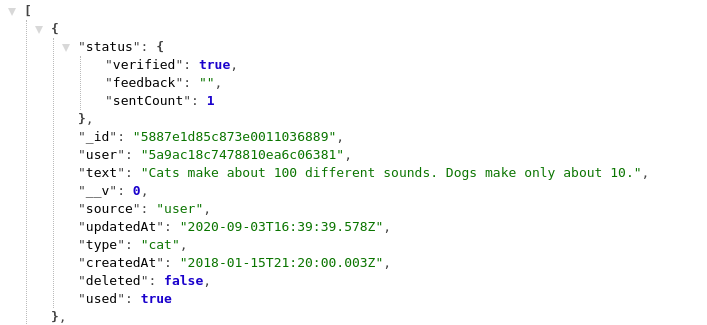
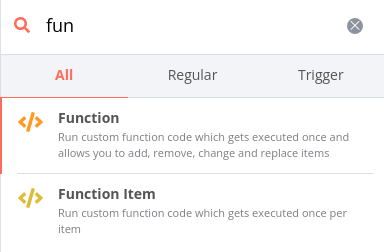
So we have a list of objects, and a single object has a field text which contain our precious fact. To extract it, we are going to create a very simple function. Let's click on the "+" icon next to "Cat API" and search for "fun":
We will pick the first one. A new modal will open, click on the grey textarea on the left so that we can edit it. We will enter this: return {"fact": items[0].json[0].text};. Click on the "x" icon to close it.
Let's send the message {"type": "cat"}, then "Execute Workflow". You should have a success and the 0 route highlighted. If you open the "Function" node you should see this:

We won't go into details into "Function" nodes in this article, the takeaway here is that you should always return an object, so we are going to create a common response: {"fact": "xxx"} for both functions so we can feed it to Slack.
Let's do Dog API now:

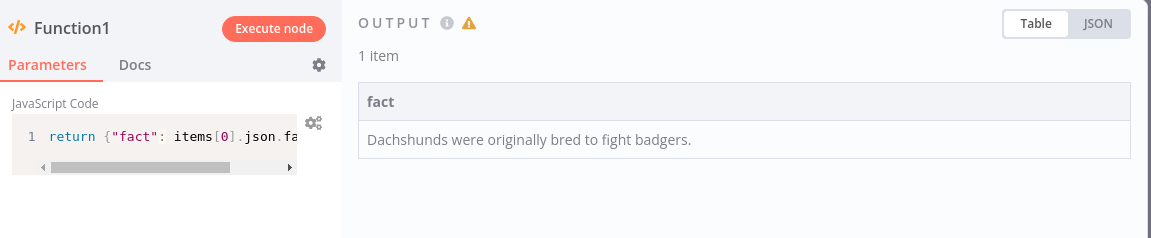
This API returns a key "facts" with an array of facts. Let's extract it with a function similar to the first one. We will enter this: return {"fact": items[0].json.facts[0]};.
Let's send the message {"type": "dog"}, then "Execute Workflow". You should have a success and the 1 route highlighted. If you open the "Function" node you should see this:
Conclusion
That's it for part 2 which is N8N + Conditional node + HTTP with a hint of Function. In the third and last part we are going to check the slack node and learn to configure the scopes for the slack bot.
If you have a problem and no one else can help, maybe you can hire the Kalvad-Team.