Cheap DDoS on-demand or How to properly load test your application!
How to run cheap, distributed DDoS-style load tests against your own API using Locust, FastHttpUser, and automated cloud workers, with a base setup you can extend.


We decline all responsibility in case of any accidents following the usage of this tool!
2 weeks ago, we published an article The future of the internet is static! AKA how we scaled to 10 million users in a minute without crashing, and 2 questions were widely asked:
- You sure the price is good? (spoiler, yes, it is)
- How do you load test the API?
The Monster

I will not write one more tutorial about locust, as I think the documentation is already good, nevertheless, I will give a base to start from.
Local setup
Pretty simple:
mkdir /tmp/locust
cd /tmp/locust
python3 -m venv env
source env/bin/activate
pip install locust
then we just want to create a simple file tasks.py inside the folder
import time
from locust import HttpUser, task, between
from locust.contrib.fasthttp import FastHttpUser


class QuickstartUser(FastHttpUser):
    wait_time = between(0.1, 1.1)

    @task
    def get_root(self):
        self.client.get("/")
(you can find this file at this url)
Major difference with the example on the official documentation: FastHttpUser
python-requestsHttpUserFastHttpUsergeventhttpclient
then we can start to bootstrap our system locally:
# open 2 terminals

# in the first one, launch locust
locust -f tasks.py

# in the second one, just launch a basic http server
http-server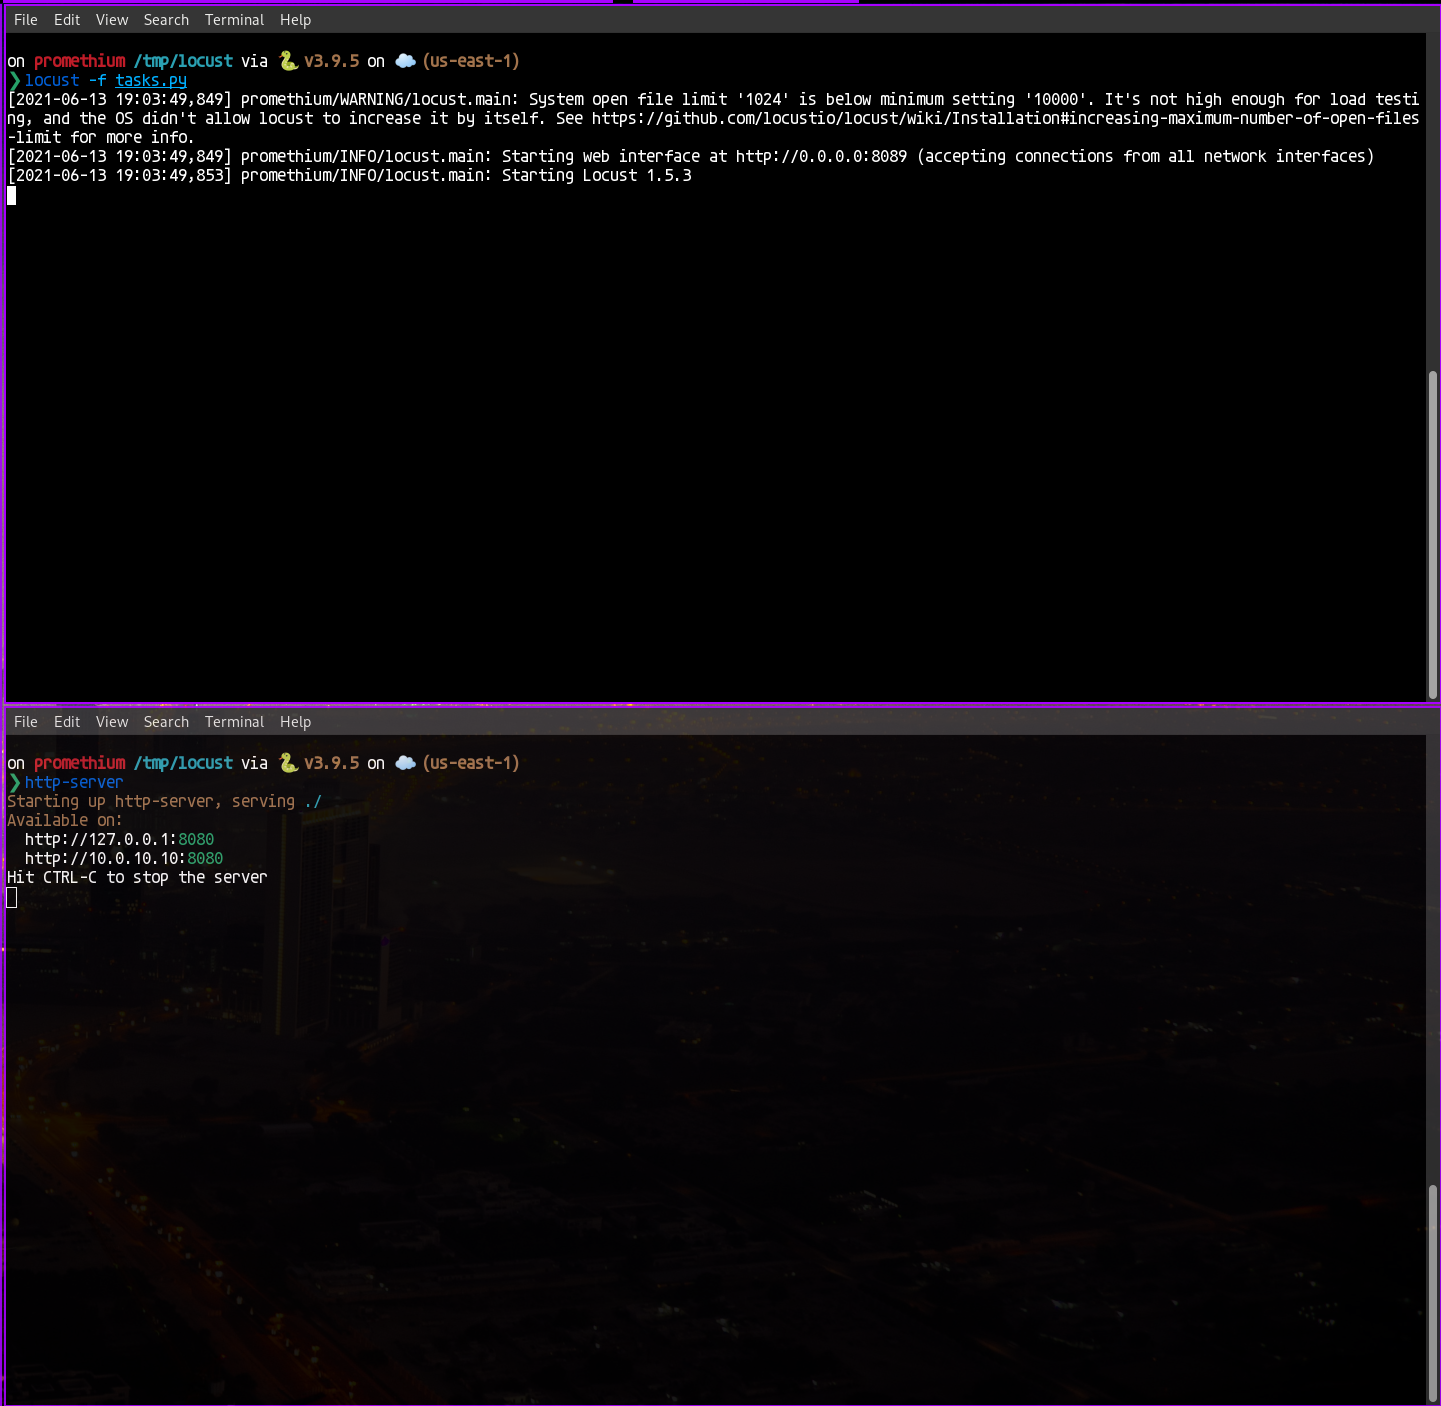
Interesting part, I'm on a test computer, and you see the alert about file limit (only 1024). No worries, it's going to be handled in the future.
Anyway, you are now ready to test. You should now have this:
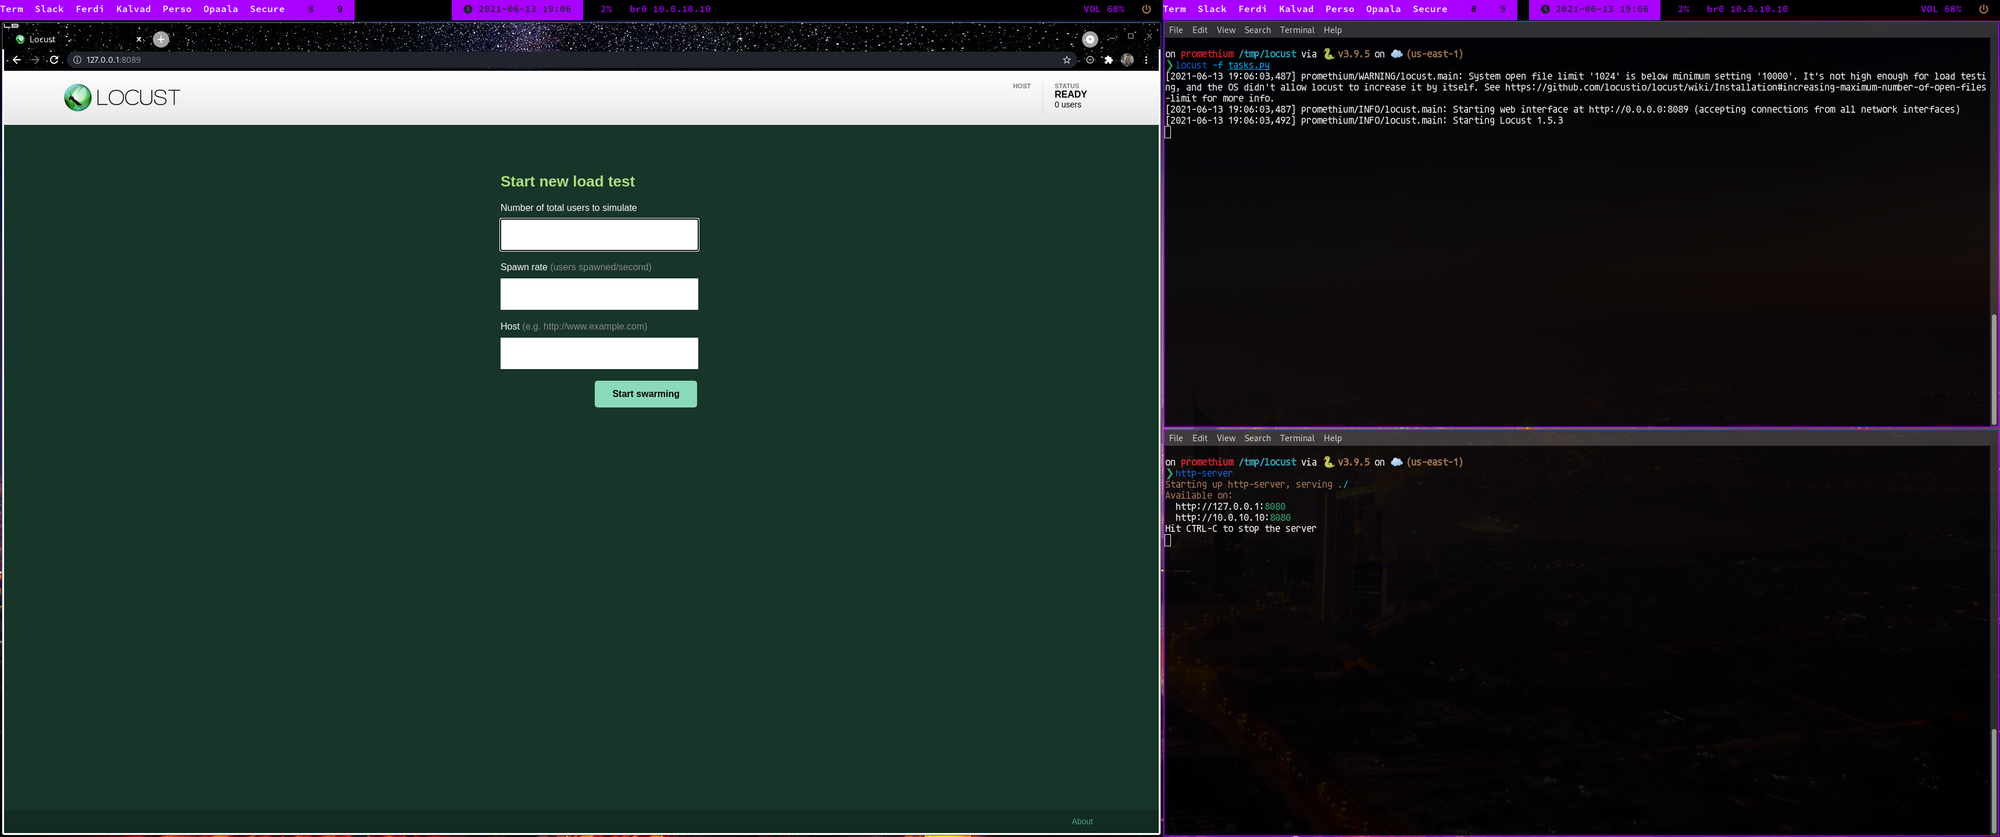
Let's start by entering some parameters:
- number of total users: 100
- Spawn rate (how many new users spawned/second): 5
- Host: 127.0.0.1:8080
Then click on start swarming.
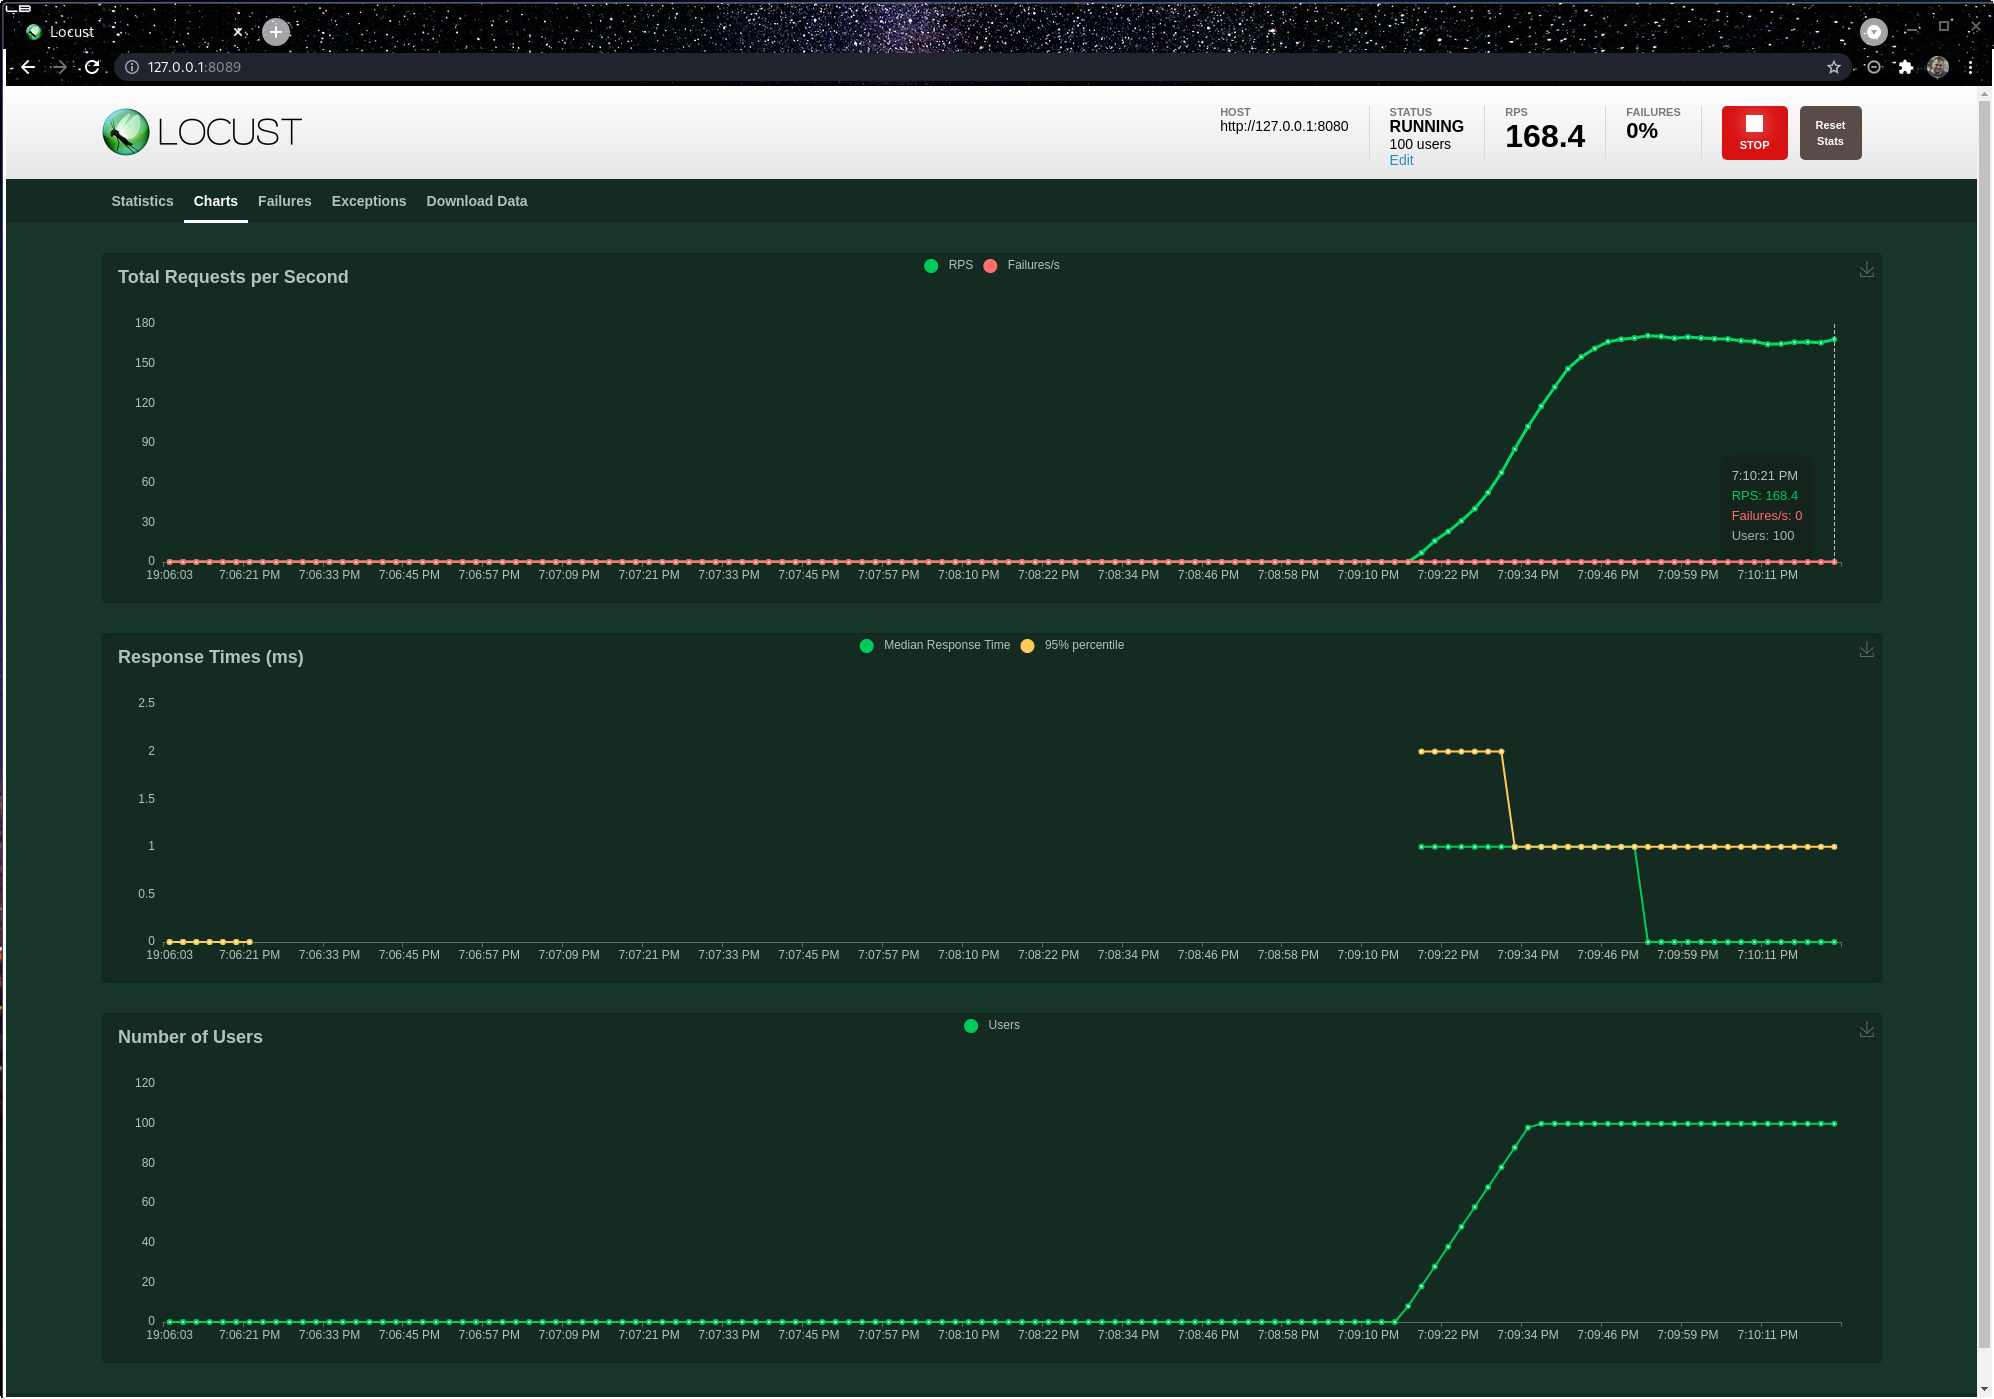
You start to generate some load pretty fun.
Limits
So right now we are running on a local system, generating 100rps, with 100 users, not bad. But how to scale?

Automation is coming
You can find all the code of the project on github KalvadTech/locust
What you want to now, is to split the load between tens/hundreds of servers. For this, we decided to use Scaleway, a very innovative French hosting provider.
Why Scaleway? Because of the price!
For 0.01 EUR (0.012 USD) per hour, you have 2 cores of a AMD EPYC 7281 16-Core Processor (very nice one), 2GB of Ram, and 200Mbps unlimited.
Or if you are more serious, like me, you can have 32c 128Gb Ram with 5Gbps for less than 1 USD / hour
Deploying the infra
That's what we want, of course with a variable number of workers. In order to do this, we are going to use the favorite tool Doan Duy Hai: Terraform.
Terraform allows you to write some Infrastructure As Code (IaC), and it's the perfect tool for our little test.
At this point, I would recommend cloning https://github.com/KalvadTech/locust, as I will go step by step to explain the structure of the project.
Root
at the root folder you are going to find a file calld main.tf
terraform {
  required_providers {
    scaleway = {
      source = "scaleway/scaleway"
    }
  }
  required_version = ">= 0.13"
}

provider "scaleway" {
  zone            = "fr-par-1"
  region          = "fr-par"
}

data "scaleway_instance_image" "locust" {
  image_id = "ff48b73a-097d-4685-b996-d3ebe50636ea"
}

module "master" {
  source = "./modules/master"
  startup_script = templatefile(
    "./startup-master.sh",
    {
      "TASKS_URL" = var.tasks_url
      "LOCUST_TYPE" = "master"
      "LOCUST_USERNAME"               = var.locust_username
      "LOCUST_PASSWORD"               = var.locust_password
    }
    )
  image_id = data.scaleway_instance_image.locust.id
}

module "worker" {
  source = "./modules/worker"
  startup_script = templatefile(
    "./startup-worker.sh",
    {
      "TASKS_URL" = var.tasks_url
      "LOCUST_TYPE" = "worker"
      "LOCUST_MASTER_IP" = module.master.locust_master_ip
    }
    )
  image_id = data.scaleway_instance_image.locust.id
  workers_number = var.workers_nb
  depends_on = [
    module.master
  ]
}
This main.tf is the base of the project, it allows us to setup the providers and initialize our modules.
As you can see, we did the choice to use Scaleway in France with the zone fr-par-1.
From line 15 to 17, it could seems a bit abstract, but it's just the id of Ubuntu 20.04 (I wish we could use Archlinux on Scaleway, but the provided version is misconfigured and hard to update).
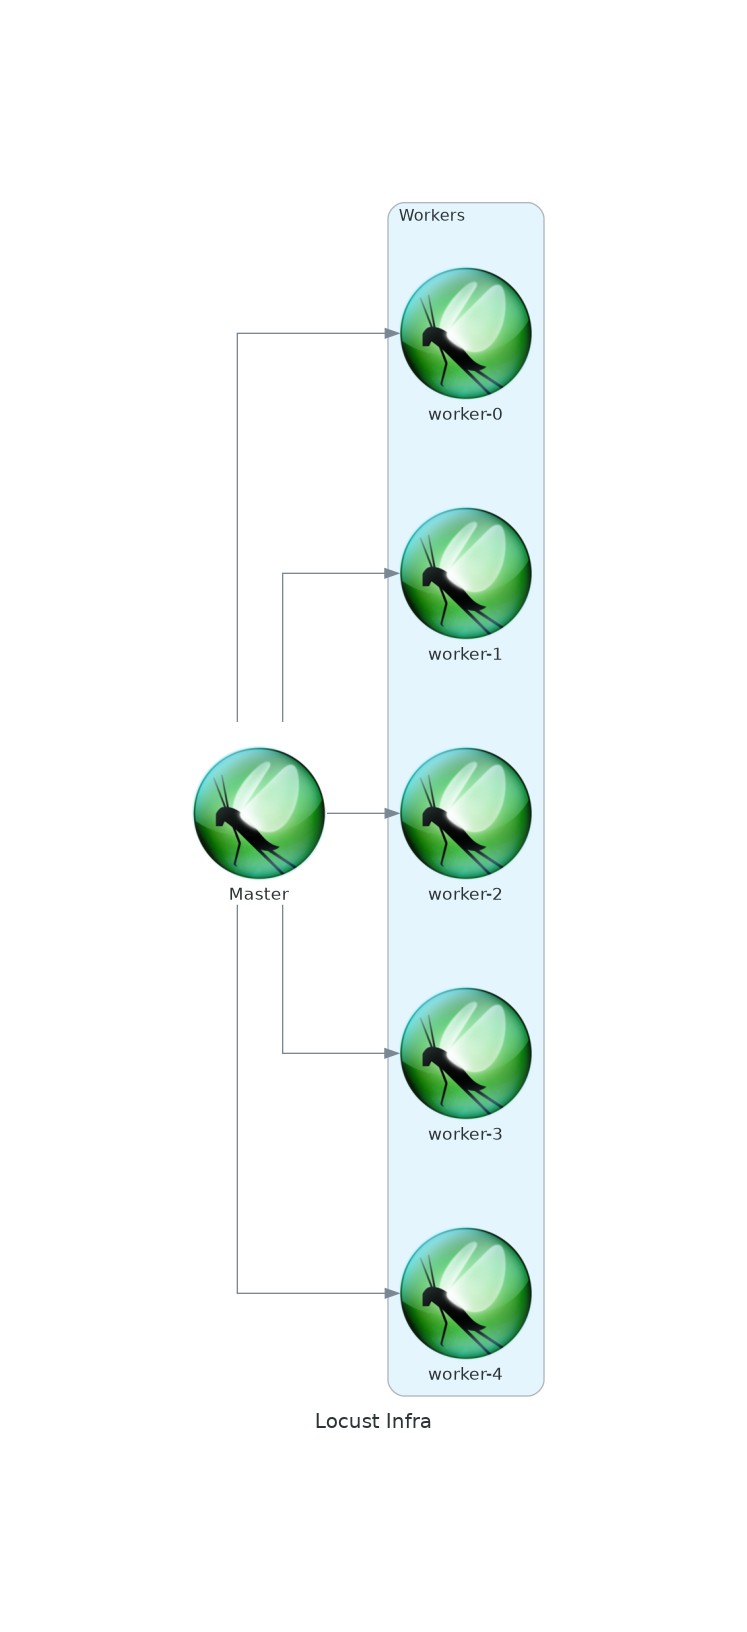
Then you can see that we initialize 2 modules:
- master
- worker
Obviously, the master is a bit different, as it should be referenced inside the worker, but at the end, everything is based on a cloud init script.
Master
The file can be found there https://github.com/KalvadTech/locust/blob/main/startup-master.sh
it's simply downloading locust, the task file, and launching the master with an admin and a password.
Worker
The file can be found there https://github.com/KalvadTech/locust/blob/main/startup-worker.sh
The startup script of the worker is almost the same, except for one point: it's referencing the master IP from the deployment.
Enough Blabla, prepare to die

Once you have cloned the folder, be sure that you have Terraform installed locally, then configure get your access key and your secret key from Scaleway, export those and init terraform:
export SCW_ACCESS_KEY="XXXXXXXX"
export SCW_SECRET_KEY="YYYYYYYYYYYYYYYYYYYYYYYYYYYYYYYYYYYYYYY"
terraform init
Time to move forward. When you want to launch your deployment, you will need 4 parameters:
- tasks_url: where to find the tasks to be executed by Locust
- locust_username: the username that you want to use to connect to the locust's admin panel
- locust_password: same, but for the password
- workers_nb: how many workers you want to launch (by default 5)
terraform apply -var="tasks_url=https://gist.githubusercontent.com/wowi42/539de2c73aa3e38c4307c1183a406bb9/raw/3f7e4027ce2c2fe6e534b5970f2ad4671c062cfb/tasks-small.py" -var="locust_username=kalvad" -var="locust_password=kalvad" -var="workers_nb=10"
....
....
....
Apply complete! Resources: 22 added, 0 changed, 0 destroyed.
Then connect to http://<your_master_ip>:8089
As you can see, I have a number of the top which is saying 320 workers, but why 320?
Because Locust worker is singled threaded, so part of the script is launching one worker per core!
FIRE!!!!!

Ready to fire?
Mission Control, enter the parameter:
- Number of total users to simulate: 1,000,000
- Spawn rate: 10,000
- Host: http://163.172.168.28 (one of our test server)
And we can start!
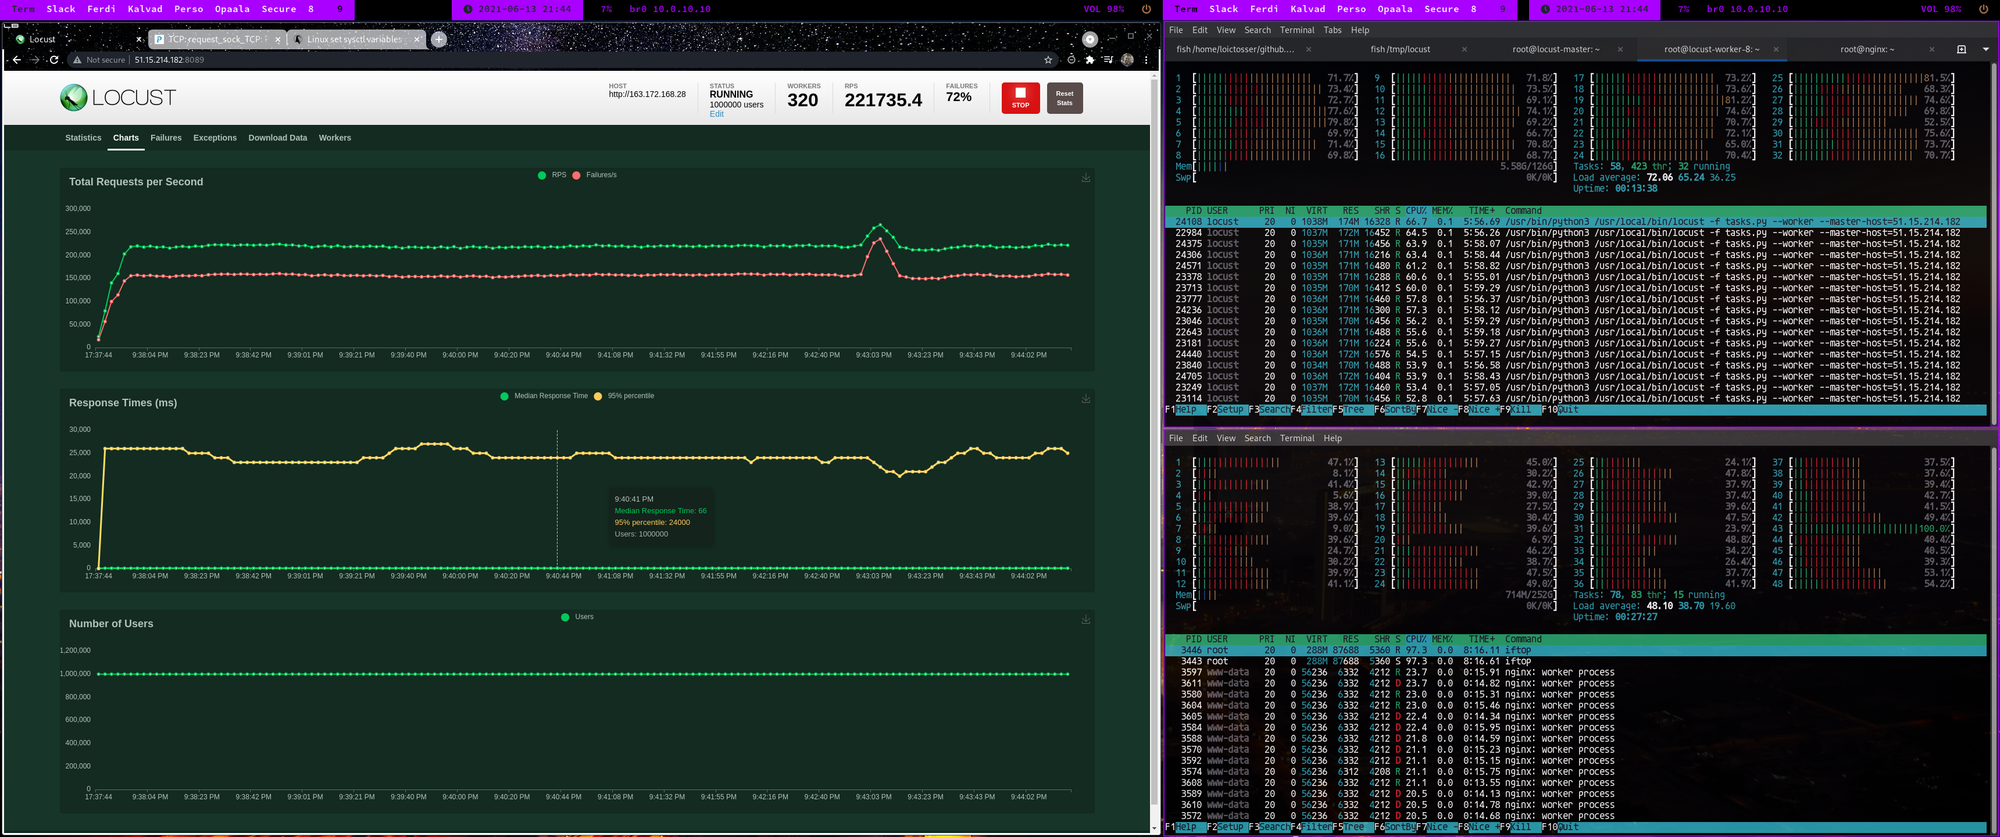
Pretty crazy, right?
so, some numbers:
- 10 servers with 32 cores and 128GB of RAM and 5Gbps for the workers
- a potential of bandwidth of 50Gbps.
- our target was a basic nginx server, with some custom sysctl
- we only did around 220k requests/seconds. Why? because the server could not take more (you start to saturate the kernel).
- for 1 hour of test, it would have cost us around 8EUR (around 10 USD) for the locust infrastructure.
Good idea to test your platform, but be careful of the cost!!!
Just imagine that instead of a doing a basic GET on / on NGiNX, part of your scenario is to download a picture, stored on S3. The picture is 2MB, and we know that AWS S3 is scaling very very well (and no, it's not sarcastic).
We said that we had a potential of 50Gbps, and that's true, it's a limit defined by the provider, so we can only execute 50Gbps = 6.25GBps.
6.25 GBps / 2MB = 3,125 requests per second = Nothing crazy for the cluster
Now let's imagine that we run our test during 1 hour. We are going to download 6.25GB*3600 = 22.5 TB.
The good point of Scaleway is that you are not paying the bandwidth on the server, which means that your test is always going to cost around 10 USD.
The bad point is that on AWS, you pay for everything, like the bandwidth of S3.
Which means that one hour of test, costing 10 USD on scaleway, is going to cost around 2,000 USD on AWS!!!
Finally, don't forget that it's illegal to use this tool to attack other people!

If you have a problem, if no one else can help, and if you can find them, maybe you can hire the Kalvad-Team.
Need Real Load, Not Toy Tests?
We build distributed load testing setups that push APIs to their actual limits, not 100 requests per second from a laptop. Terraform, Scaleway or your cloud of choice, Locust workers spread across regions, and clean teardown when the run ends. Useful for teams shipping APIs that must survive launch day, traffic spikes, or audit-grade capacity proofs. Stress test your API with us.