Export your Angular component as a Web Component


Front-end has changed a lot in the last decade. And web component is one, if not the, best feature now natively available on all the recent browsers.
Here is a tutorial on how to export an Angular library into a web component.
Context
We had to build a dialer for Ziwo. Ziwo is a Call Center Software and this dialer is the main front-end application to start or receive a phone call. This Dialpad is a small component (640x340) that need to be very easy to embed in any other front-end application.
Existing solution
We were tasked to rewrite the existing dialer which was a bit old and therefore hard to maintain. We also wanted to improve the solution for the integrations, mostly because of the following issues:
- no shadow DOM: meaning all the classes or IDs we were using needed to be unique - even among the host applications. We had to carefully handpick and prefix every classes and IDs used.
- messy dependencies: the existing dialer was using Jquery v.3.5.1. But what happens if the host application is using another version of Jquery? - A lot of conflicts, and some lack of sleep.
- dynamically injected HTML: without a web-component, this kind of integrations requires to manually inject HTML using Javascript. This is not only a tricky task, it is also prone to error. Indeed, you had to make sure the DOM was completely loaded before performing action and had to rely on JS to communicate with the dialer.
Our solution
A web-component. The web-component highly reduced the stress around releasing a new version of the dialer. For our dev team, now the export as a web-component is working, they have nothing to worry about. They can work on our dialer just like it is a normal application.
And for the integrators, this is what a fully working dialer looks like:
  <script type="text/javascript">
    function dialerEvents(ev) {
      console.log('New dialer event => ', ev);
    }
  </script>

  <script src="./dialer.js" charset="utf-8"></script>

  <kalvad-dialer onevents="dialerEvents" integration="demo-component"
    authenticationtoken="xxxx"></kalvad-dialer>
Needless to say it was a huge relief for everyone.
To build our web component, we came up is a simple setup:
- the dialpad, built as a standard Angular library
- a library wrapper, which export the dialpad library as a web component

Introduction to Web Component
Web component simply allows you to encapsulate HTML/JS/CSS into a single HTML tag. It's very powerful since you can basically write a complete website, export it as a single JavaScript file, and run it anywhere using a single line of code of HTML.
- Shadow DOM: the content of the web component (HTML/JS/CSS) is rendered in a separated DOM.
- Complete interaction: you can pass parameters to your web component and receive data from your web component via call back functions or window events
- Support all browser's feature: you can access the client's microphone, use webRTC, push notification.. you have access to everything!
In short, it's a wonder.

Project Architecture
We didn't want to overthink this and we simply created 2 standard angular sub-projects. One is the dialer itself as an angular library, and second one is an angular application that wraps the dialer library and export it as a web-component.
The main application itself has no real purpose. We simply use it as a demo of our dialer library.
# Create a standard angular application
$ ng new dialer-app --style=scss

# Create the dialer library
$ ng g library dialer

# Create the library which wraps the dialer as a web component
$ ng g application dialer-component
Get the library ready
The code of the dialer doesn't matter here. Let's just add some content using @ngx-translate.
<!-- dialer-app/projects/dialer/src/lib/dialer.component.html -->
<div>
    {{ 'HELLO_WORLD' | translate }}
</div>
Time to build our Web Component !
- Install @angular/elements & @angular/platform-browser-dynamic
npm i @angular/elements @angular/platform-browser-dynamic --save2. Edit your dialer-component as follow:
// projects/dialer-component/src/app/app.module.ts

import { Injector, NgModule } from '@angular/core';
import { BrowserModule } from '@angular/platform-browser';
// ...
import { DialerComponent } from '../../../../projects/dialer/src/public-api';
import { DialerModule } from '../../../../projects/dialer/src/lib/dialer.module';
import { TranslateModule, TranslateService } from '@ngx-translate/core';
import { createCustomElement } from '@angular/elements';

// This abstract class is then implemented by our main module. It generates an HTML element
export abstract class WebComponentModule {
  constructor(injector: Injector, component: InstanceType<any>, name: string) {
      const ngElement = createCustomElement(component, {
          injector,
      });
	// change the first parameter to change the name of the HTML tag generated
    customElements.define(`kalvad-${name}`, ngElement);
  }

  public ngDoBootstrap():void {}
}

// Define your module with your DialerModule as an entry component.
@NgModule({
  imports: [
    BrowserModule,
    DialerModule,
    TranslateModule.forRoot(),
    // ...
  ],
  entryComponents: [DialerComponent]
})
export class AppModule extends WebComponentModule {

  constructor(
    readonly injector: Injector,
    readonly translateService: TranslateService,
  ) {
    super(injector, DialerComponent, 'dialer');
    // small trick to embed your translations directly into your web component
    this.translateService.setTranslation('en', {
      'HELLO_WORLD': 'Hello World',
    });
    this.translateService.setTranslation('fr', {
      'HELLO_WORLD': 'Salut terrien',
    });
    this.translateService.setTranslation('ar', {
      'HELLO_WORLD': 'مرحبا بالعالم'
    });
    this.translateService.setDefaultLang('en');
  }

}
3. Write the compile file
// projects/dialer-component/src/app/compile.ts
import {enableProdMode} from '@angular/core';
import {platformBrowserDynamic} from '@angular/platform-browser-dynamic';
import {AppModule} from './app.module';
import 'zone.js';

enableProdMode();

platformBrowserDynamic().bootstrapModule(AppModule).catch(err => console.log(err));
Make sure tsc is able to execute this file by adding this line into your tsconfig file:
// projects/dialer-component/ts-config.app.json
{
  "extends": "../../tsconfig.json",
  "compilerOptions": {
    "outDir": "../../out-tsc/app",
    "types": []
  },
  "files": [
    "src/main.ts",
    "src/polyfills.ts"
  ],
  "include": [
    "src/**/*.ts", // <- add this line
    "src/**/*.d.ts"
  ]
}
And that's it. We have everything ready to generate our web-component !
Let's build & Test
To test, create a demo-componentand some files at the root of your folder:
mkdir demo-component
touch demo-component/index.html
mkdir demo-component/assets
You can edit index.html and add the following code:
<html>
<head>
<meta charset="UTF-8" />
<title>Dialer Demo</title>
</head>
<body>
<h1>Dialer Demo - Web component</h1>
<script src="./dialer.js" charset="utf-8"></script>
<kalvad-dialer></kalvad-dialer>
</body>
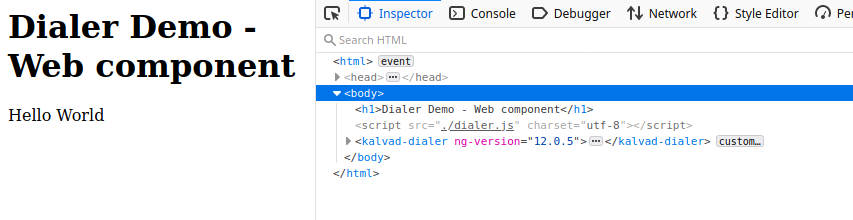
</html>You can see, we don't do much here. We simply import our soon-to-be component and instanciate a new html tag names 'kalvad-dialer'.
Now everything is ready, it's time to generate our web component !
Add the following commands to your package.json#scripts file:
// ./package.json
//// scripts:
    "build:dialer": "ng build dialer",
    "build:web-component": "npm run build:dialer && rm -rf dist/dialer-component && npm run build:web-component:compile && npm run build:web-component:concat && npm run build:web-component-folder",
    "build:web-component:compile": "ng run dialer-component:build:production --main='projects/dialer-component/src/app/compile.ts'",
    "build:web-component:concat": "cat dist/dialer-component/runtime.*.js dist/dialer-component/main.*.js > dist/dialer-component/dialer.js",
    "build:web-component-folder": "cp dist/dialer-component/dialer.js ./demo-component && cp -r src/assets/ ./demo-component/assets/"
I won't explain each command, but if you take time to read it carefully, it's really easy to understand. We compile our dialer-component into a single dialer.js file.
And now. Let's try:
npm run build:web-component
firefox ./demo-component/index.html
Et voila! Our web component is alive.
Go a little bit further
Input parameters
You can pass parameters to your web-component simply by adding them as HTML properties:
<kalvad-dialer name="Mathieu"></kalvad-dialer>// projects/dialer/src/lib/dialer.component.ts
// ..
export class DialerComponent implements OnInit {
@Input() public name;
// ..
public ngOnInit(): void {
console.log('Name ', name); // prints 'Mathieu'
}
}Note: web-components will transform all HTML property names to lower case. So if you send a value with such name <kalvad-dialer helloWorldProp="coucou"></kalvad-dialer> you will have to retrieve it like this: @Input() public helloworldprop
Output values
If you want to send data from your web-component to the host applications, you have 2 solutions:
- use a call back function: the host application can provide a callback function (the function must be attach to the global window) and the web-component can call this function anytime.
- use window events: window events are a great way to share data between different components. Your web component can easily trigger events and share data in the details property of the event.
You are good to go!
You can find a working example here: https://github.com/Dlacreme/dialer-web-component
If you have a problem and no one else can help. Maybe you can hire the Kalvad-Team.
Photo by Ryoji Iwata on Unsplash